How to Make a Posable Amigurumi Doll
The cardigan I was working on is all done and has been packed up and shipped out to the client. I can’t wait to see how it looks on her! Now, I’m on to my next project. I’m always sending pictures of funny amigurumis to my boyfriend while I’m at work and one day he was like, “Can you make mini versions of us?”. Once he put the idea in my head I had to do it!
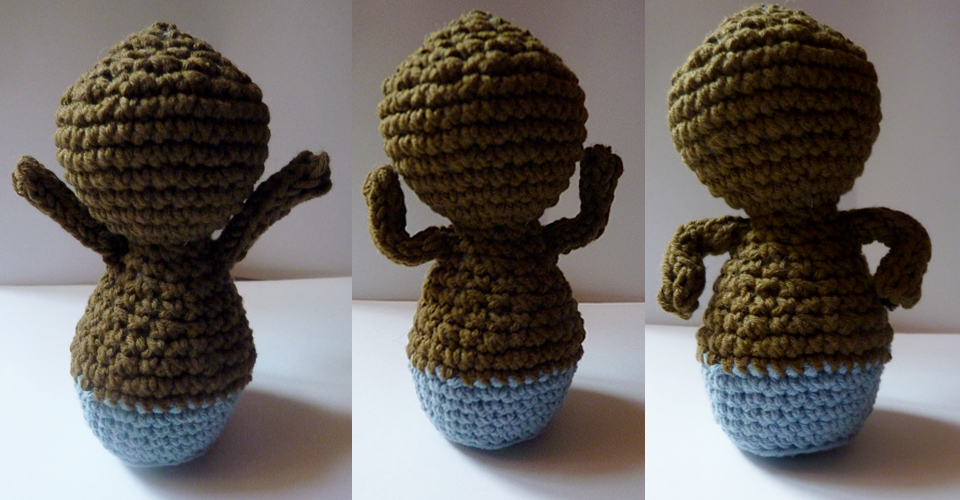
I’m leaving for China on Saturday and thought it would be so funny to take pictures of the dolls doing everything that we’re doing. It would make for pretty awesome vacation photos! What would make it even better, I thought, would be if we could pose the dolls for the pictures.
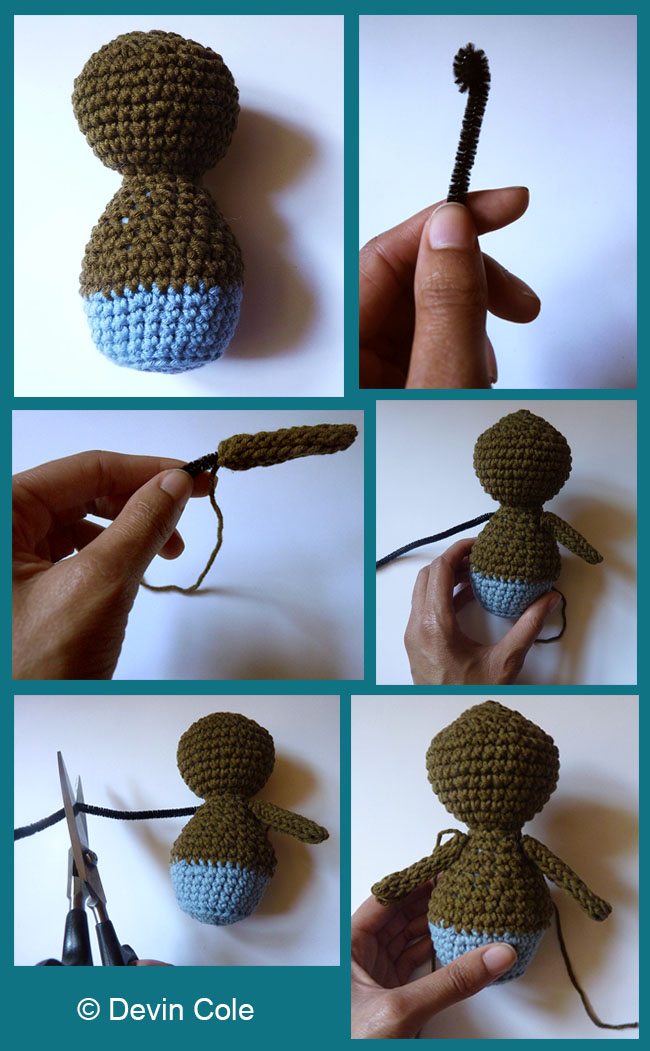
So, here’s a short tutorial on how I did it. It was pretty simple. All you’ll need is a pipe cleaner and something to trim it with.
A few tips to keep in mind:
I made the arms with a crochet i-cord (which I learned to do by watching this video). I decided to use an i-cord because just crocheting in the round would make the arms too stiff. Also you’ll want to make sure that that you roll the tip of the pipe cleaner a couple times so that it won’t poke through your work. When you’re done, just secure the arms to the body by sewing them with a tapestry needle. Then you’re done! Easy, right?